Skip to Main Content

How To Edit The Home Page Slider

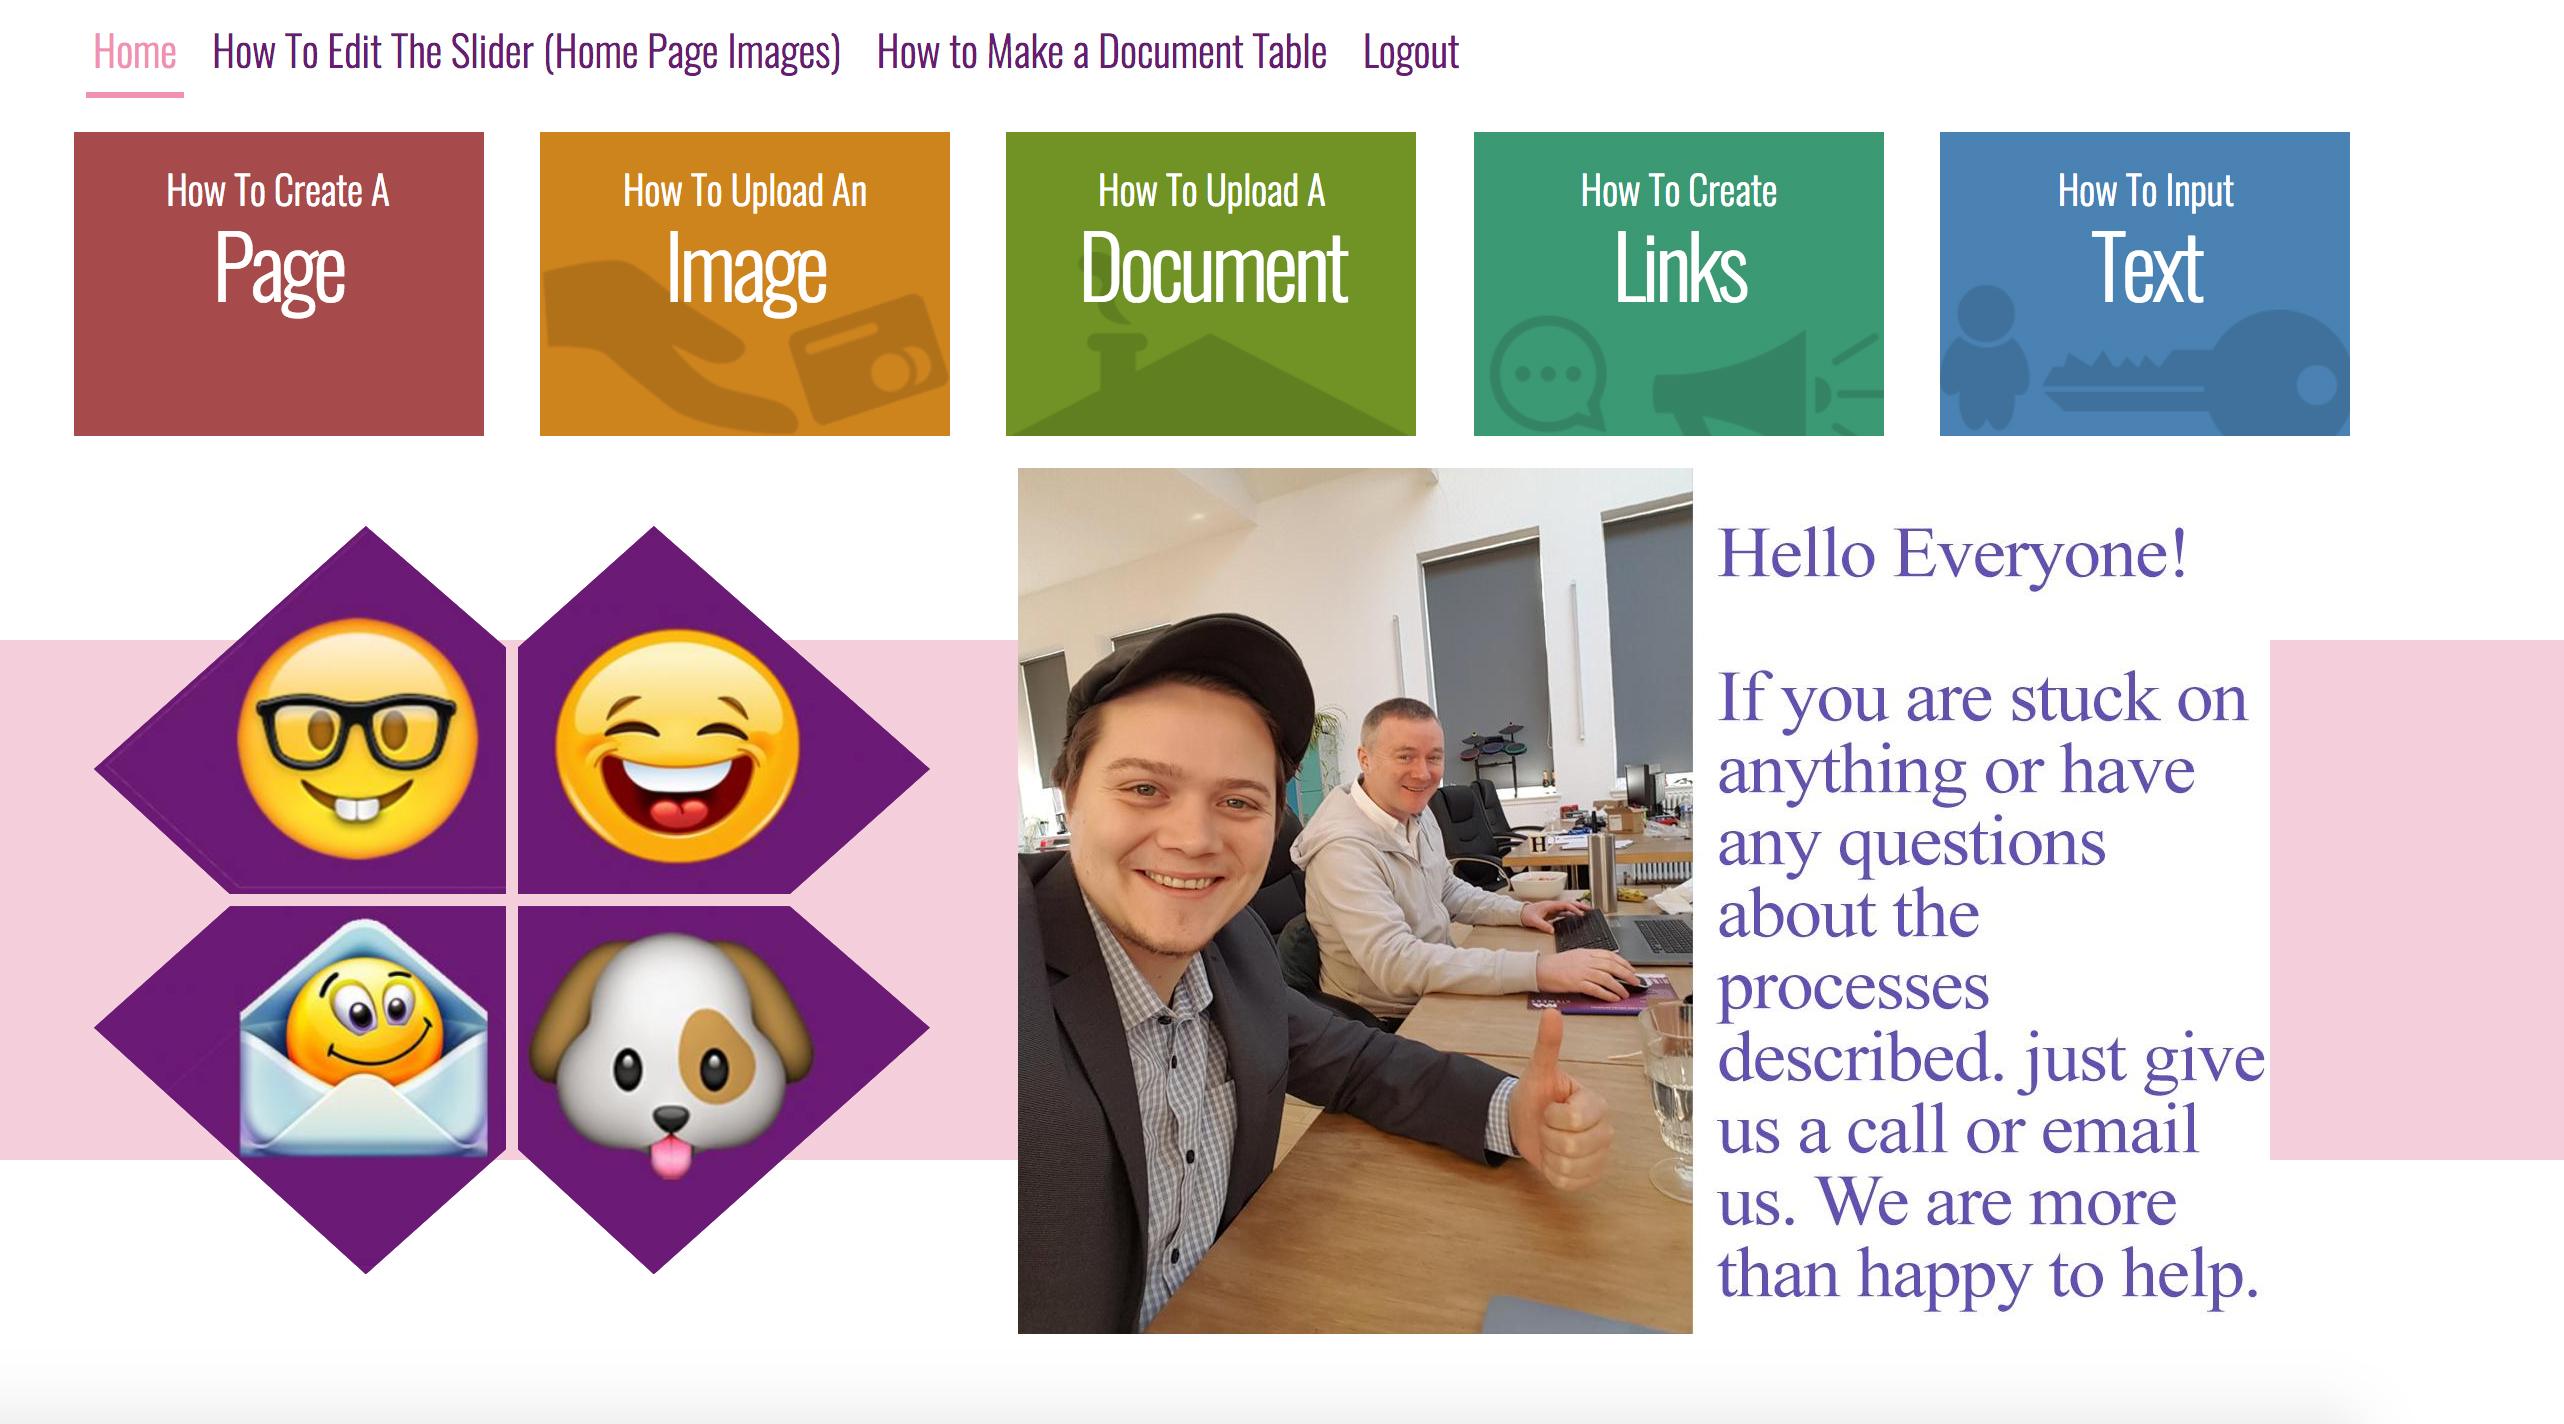
If you look at the homepage on this website, you will notice the 'Slider', this is the collection of segments for images & text. You can have as many different slides as you like, and many people find this area an invaluable space for conveying news and important information to tenants. 

In the case of this Web Guide, i have opted for a single slider, it is therefore stationary and part of the aesthetics of the website. This is an option that is available to you also however in all likelyhood you will have multiple slides that switch after a pre-determined amount of time (we will show you how to change the slide time) and you will also likely be editing the slider with some frequency.

We will therefore explain how this can be achieved:

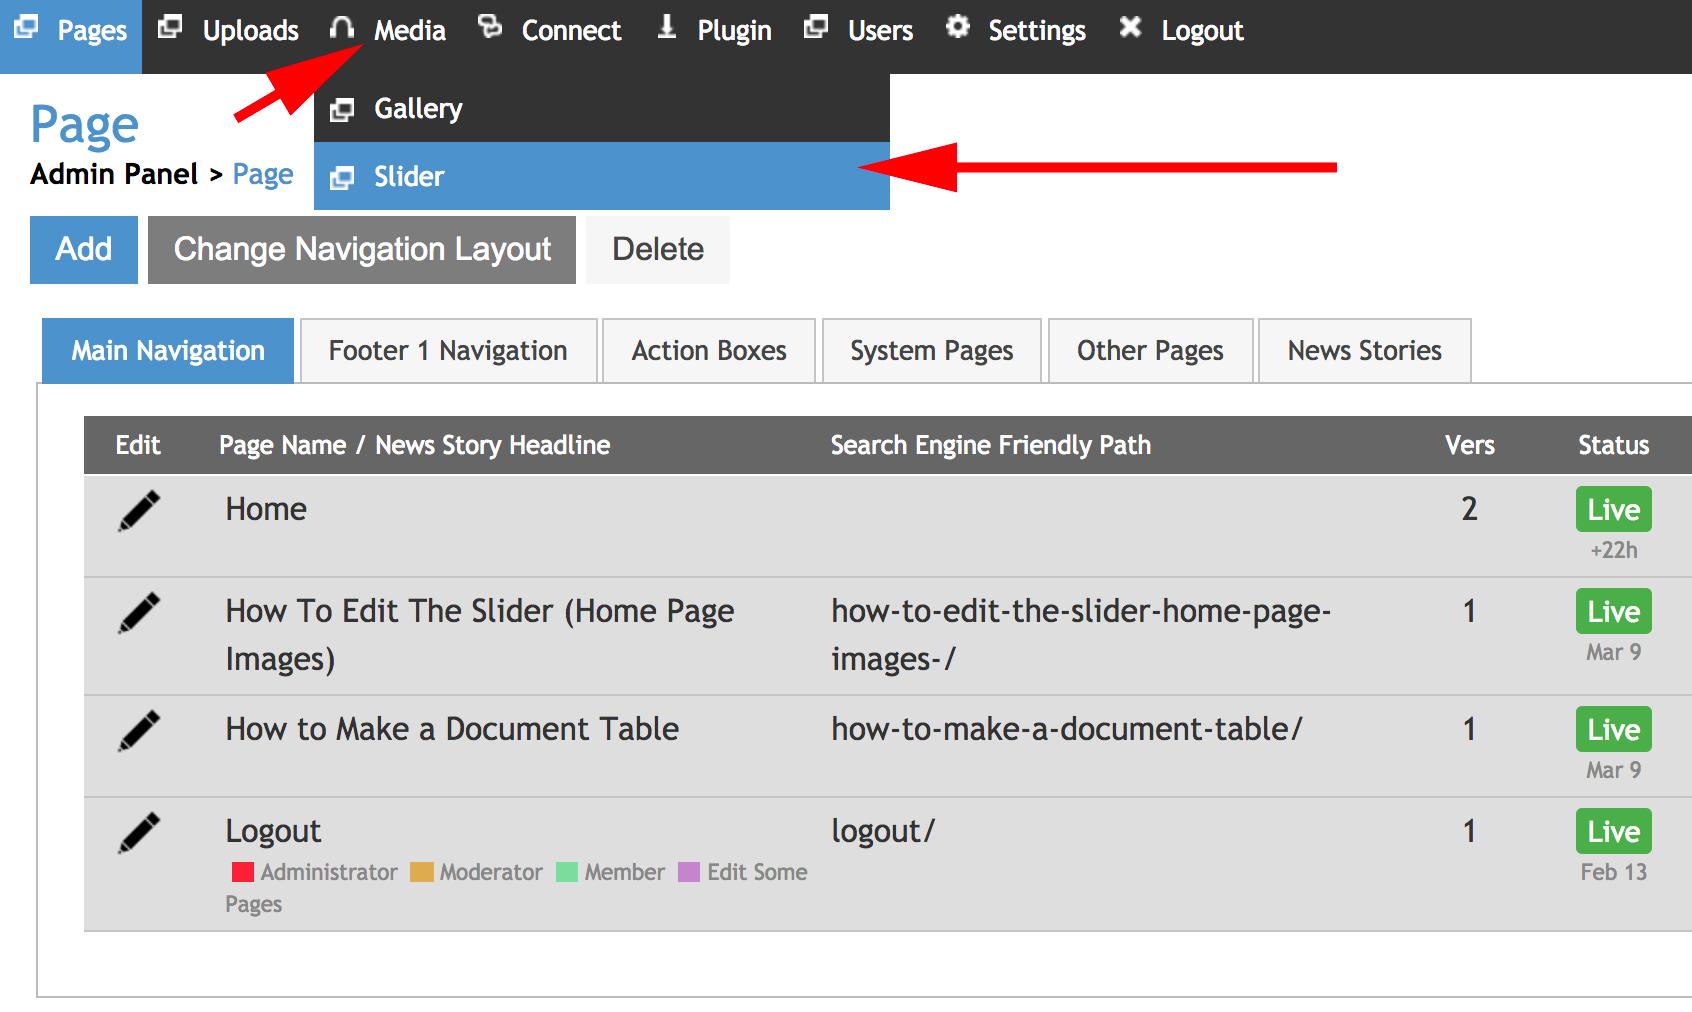
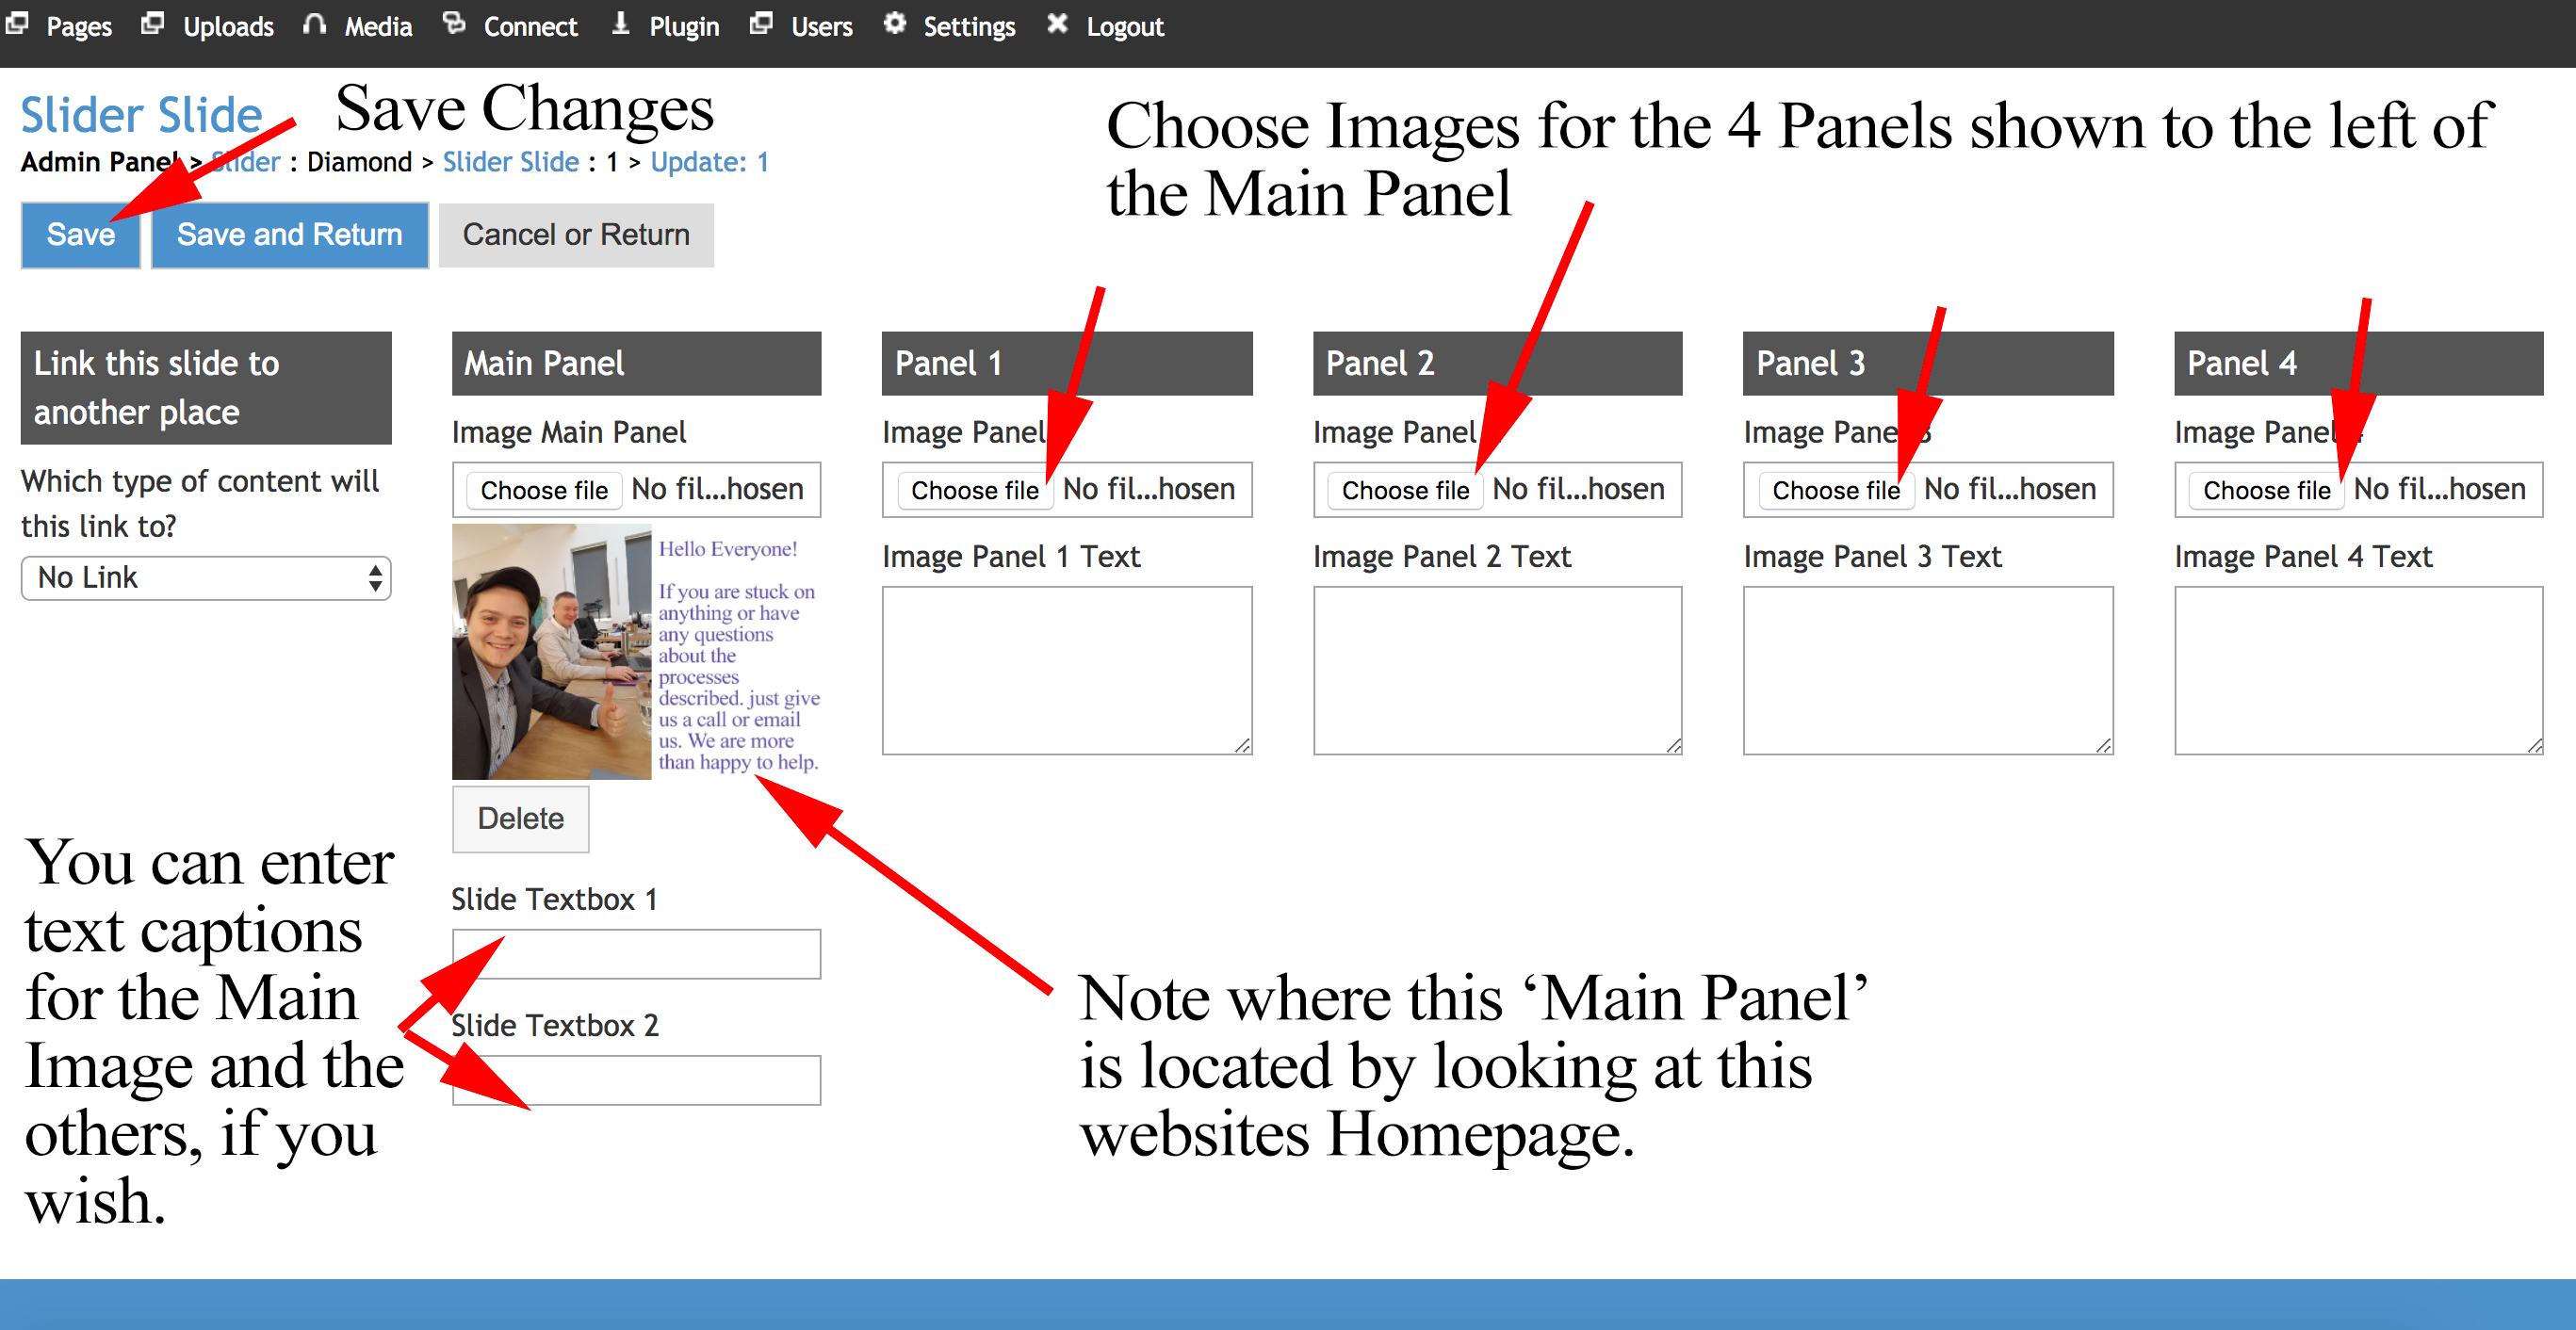
  • Step 1: Login to the admin area of your website, and hover over the tab 'Media', this will allow the link to the Sliders to appear, click the link to proceed. (as highlighted below)

How to edit slider step 1 click slider

  • Step 2.A: If you want to create a new slide (Either because you have none, or want multiple slides that will switch after 'x' amount of seconds) then you must click on the button 'Add New' as highlighted below.

  • Step 2.B: If you want to edit a slide that already exists, or the one which you just created, click on the 'Slide Editor' button highlighted below. 

how to edit slider step 2 add new or edit slider

  • Step 2.C: You are able to edit the properties of the Slider, i.e. It's name, its type, the animation used for the transition, and probably most importantly for you, the transition speed. To do so, click on the pencil icon. (As highlighted below)

    • The transition speed is how long you set each slide to remain for before switching to the next one, if information is more important, you should make the slide stay for longer to give people more of a chance to read it. (Or to click on it if you are using the slider for links, which we would advise is a very useful thing)

how to edit slider step 2C main properties

  • The image below demonstrates where you can edit the main properties of the selected Slide. This is where you land after clicking the pencil in the previous step.

  • Click Save or Save and Return once you are ready to proceed with editing the slide. 

How to edit slider control page

  • Step 3: After you have selected the 'Slide Editor' button demonstrated in Step 2B, you will see a page that is very similar to the one you were just on, except the 'Slide Editor' button is gone. Do not worry this is where you are supposed to be, the next step is to click the pencil icon. (As highlighted Below)

how to edit slider step 3 click pencil

  • Step 4: After clicking on the pencil icon within Slide Editor as shown in Step 3, you will be taken to the page where you can edit, upload and delete the images that will be used in the slider, in the Main Panel and the 4 other panels within it. You can also add text captions to your slider images here. 
    • In order to upload a new image, click the button 'Choose File' in the assoicated location. (As highlighted below)

    • To proceed and save the changes you have made to the slider, click either 'Save' or 'Save and Return'.

how to edit slider step 4 upload images

  • Step 5: In order to make images that fit well within the 4 other panels, you may need to do some editing of the image. This could be done using the resize option when uploading the image, but i find it is best to create the image yourself using image editing software such as Photoshop, if you have the capacity to do so. 
    • I use the trial and error approach as i find that the easiest way to get the image the way i want it.
       
    • A good technique is to take a screenshot of the section you want to fill with an image. (A Google search for how this is done on your model of computer should reveal an easy method of doing that)

    • After you have the screenshot of the section you want, try copying your desired image into that, and arranging it in a way you think will work.

    • After that, upload the image in the uploads section and insert it using the method shown in Step 4. 

    • Save and Publish your changes, and have a look at the homepage to see if it has worked the way you wanted, if not, try again! 

    • Below are some examples of the editing I done to achieve the images seen on the homepage of this guide.

how to edit slider screenshot

how to edit slider image overlaid on the screenshot

how to edit slider further tinkering with the template

how to edit slider end product template

  • Step 6: Once you are happy with everything in your slider, the images, the text, if you have any links etc. Save and Publish it. 
    • Upload multiple slides to show different pieces of information.

    • Once you have completed all the slides you want, decide how frequent you want the images to slide between each other.

    • You are now done, enjoy your work!

Here Is The End Product - Our Slider

how to edit slider completed slider