- Step 1: Once you are logged into the admin section of your website, find the gallery section by selecting; Media, Gallery.
- This will take you to the page where you can edit image galleries or create new ones.
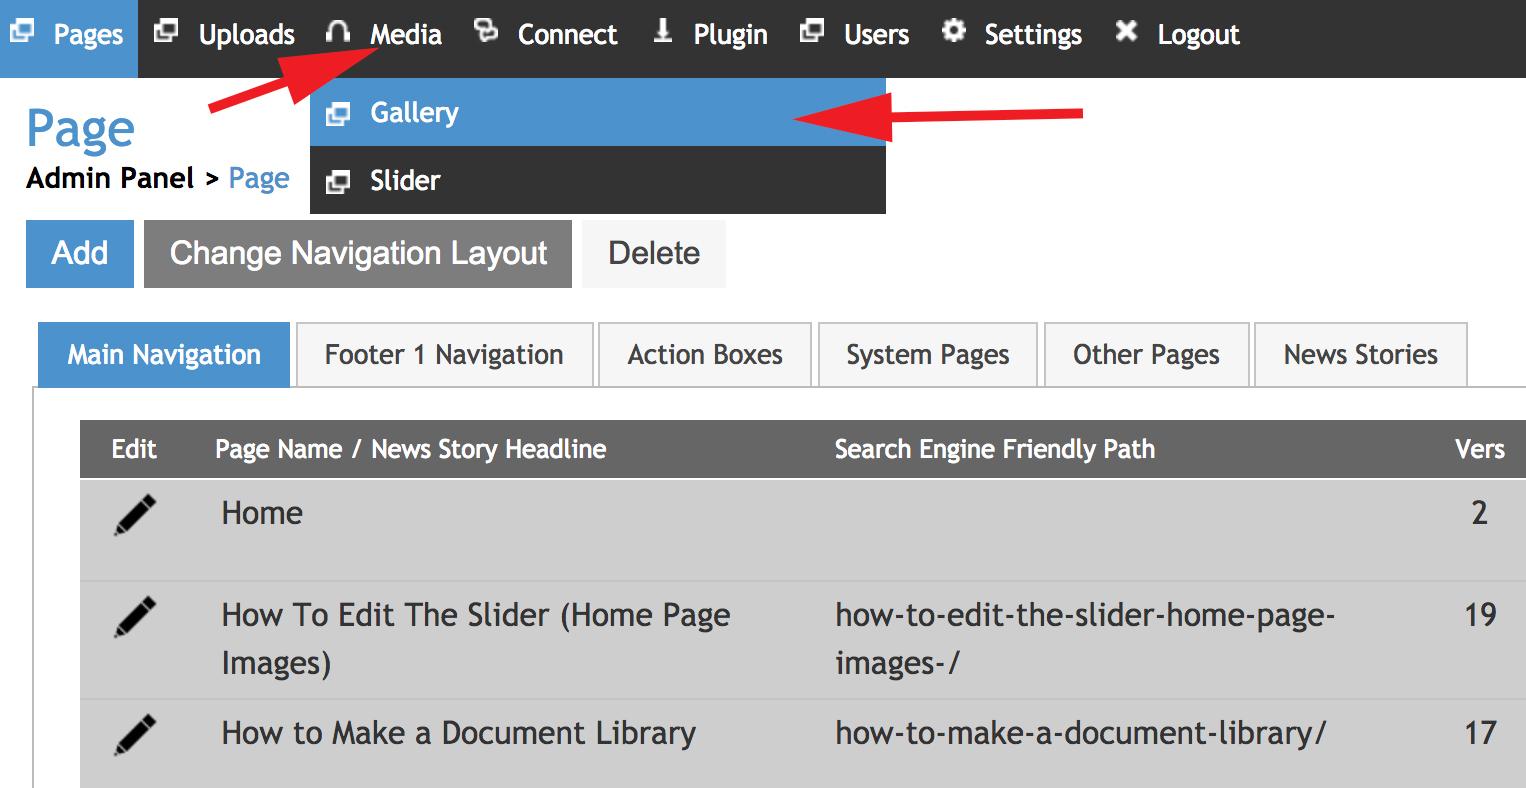
- Step 2: When you are in the gallery section you can create new galleries by clicking 'Add New', and edit existing ones by clicking 'Item Editor'.

- Step 3: To edit the attributes of the Gallery, click the pencil icon highlighted above.
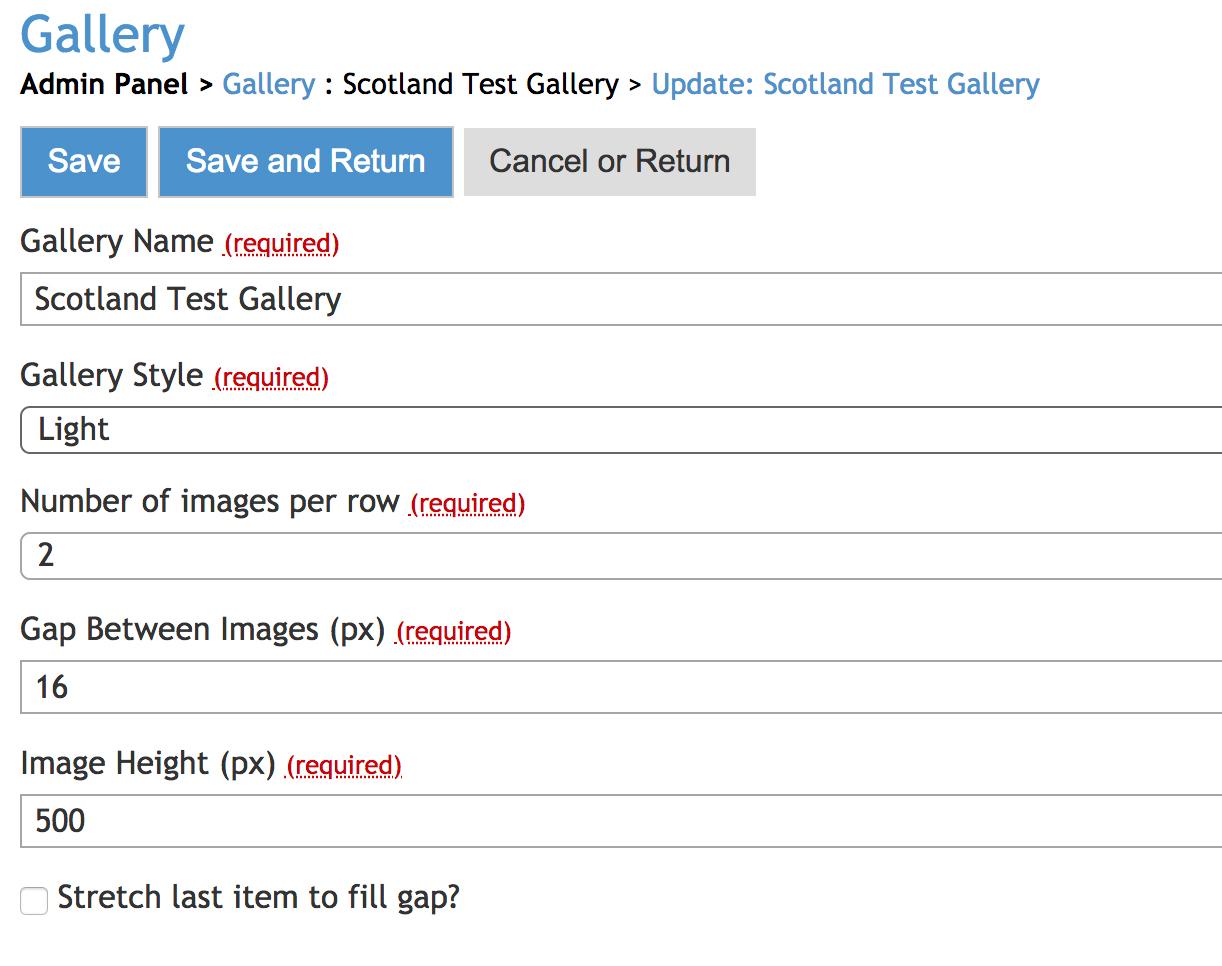
- Here you can choose between several different gallery styles (give them all a try!)
- This is where you will edit the size and layout of the gallery.
- Choosing the number of images per row will determine the width of the images.
- You can also choose the height of the images here.
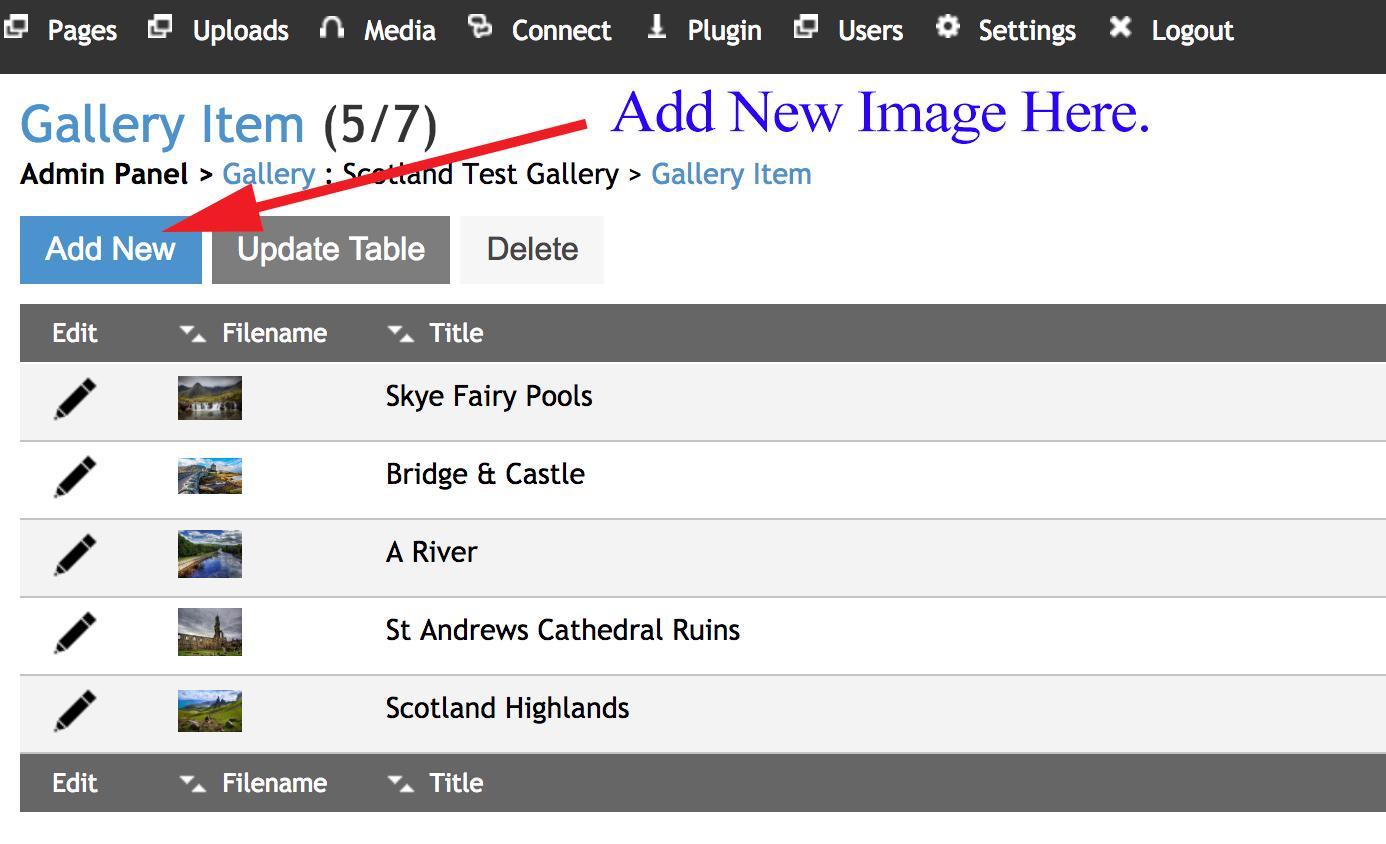
- Step 4: Click on 'Item Editor' as highlighted in step 2 to be taken to the section where you can add images to the gallery.
- Click 'Add New' to add more images to the gallery.
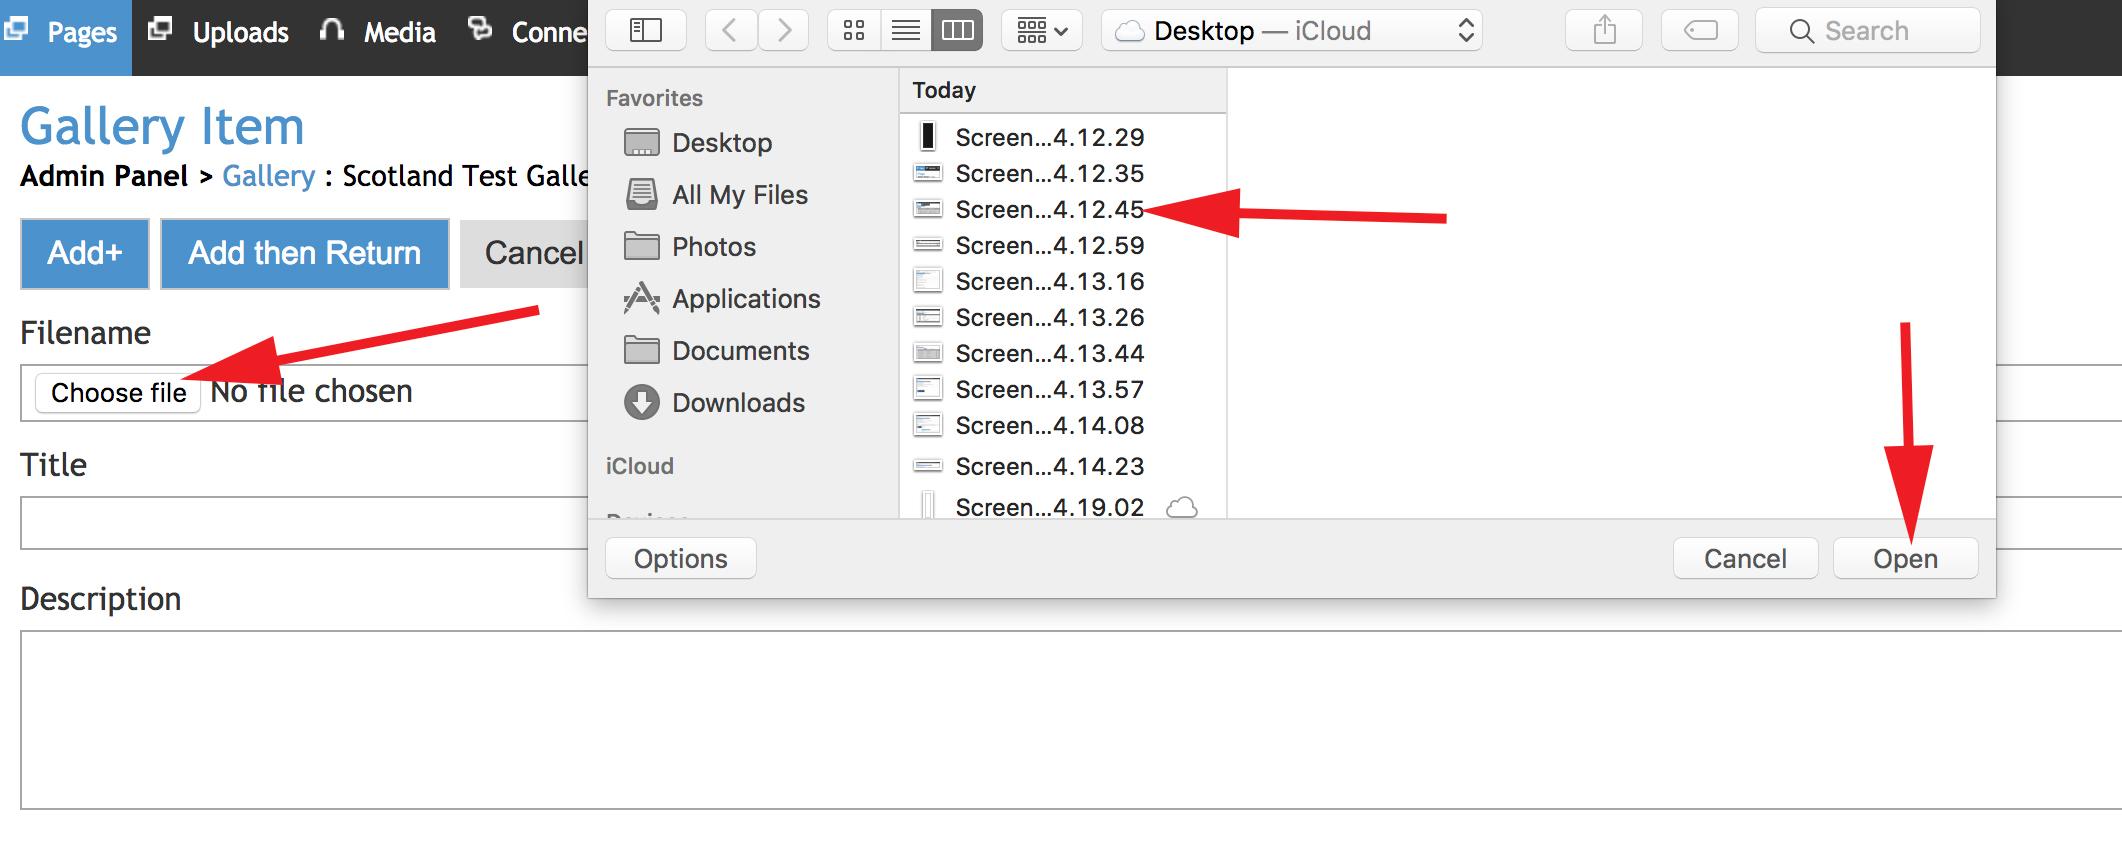
- Step 5: When you click 'Add New', you will then be prompted to select and upload your chosen image from your computer.
- Select your chosen image.
- Click 'Open' as highlighted below.
- Give the image a title and description if you want to.
- Select 'Add+' if you are done with this image and want to upload more.
- Select 'Add then Return' if you are done adding images to the gallery for now.
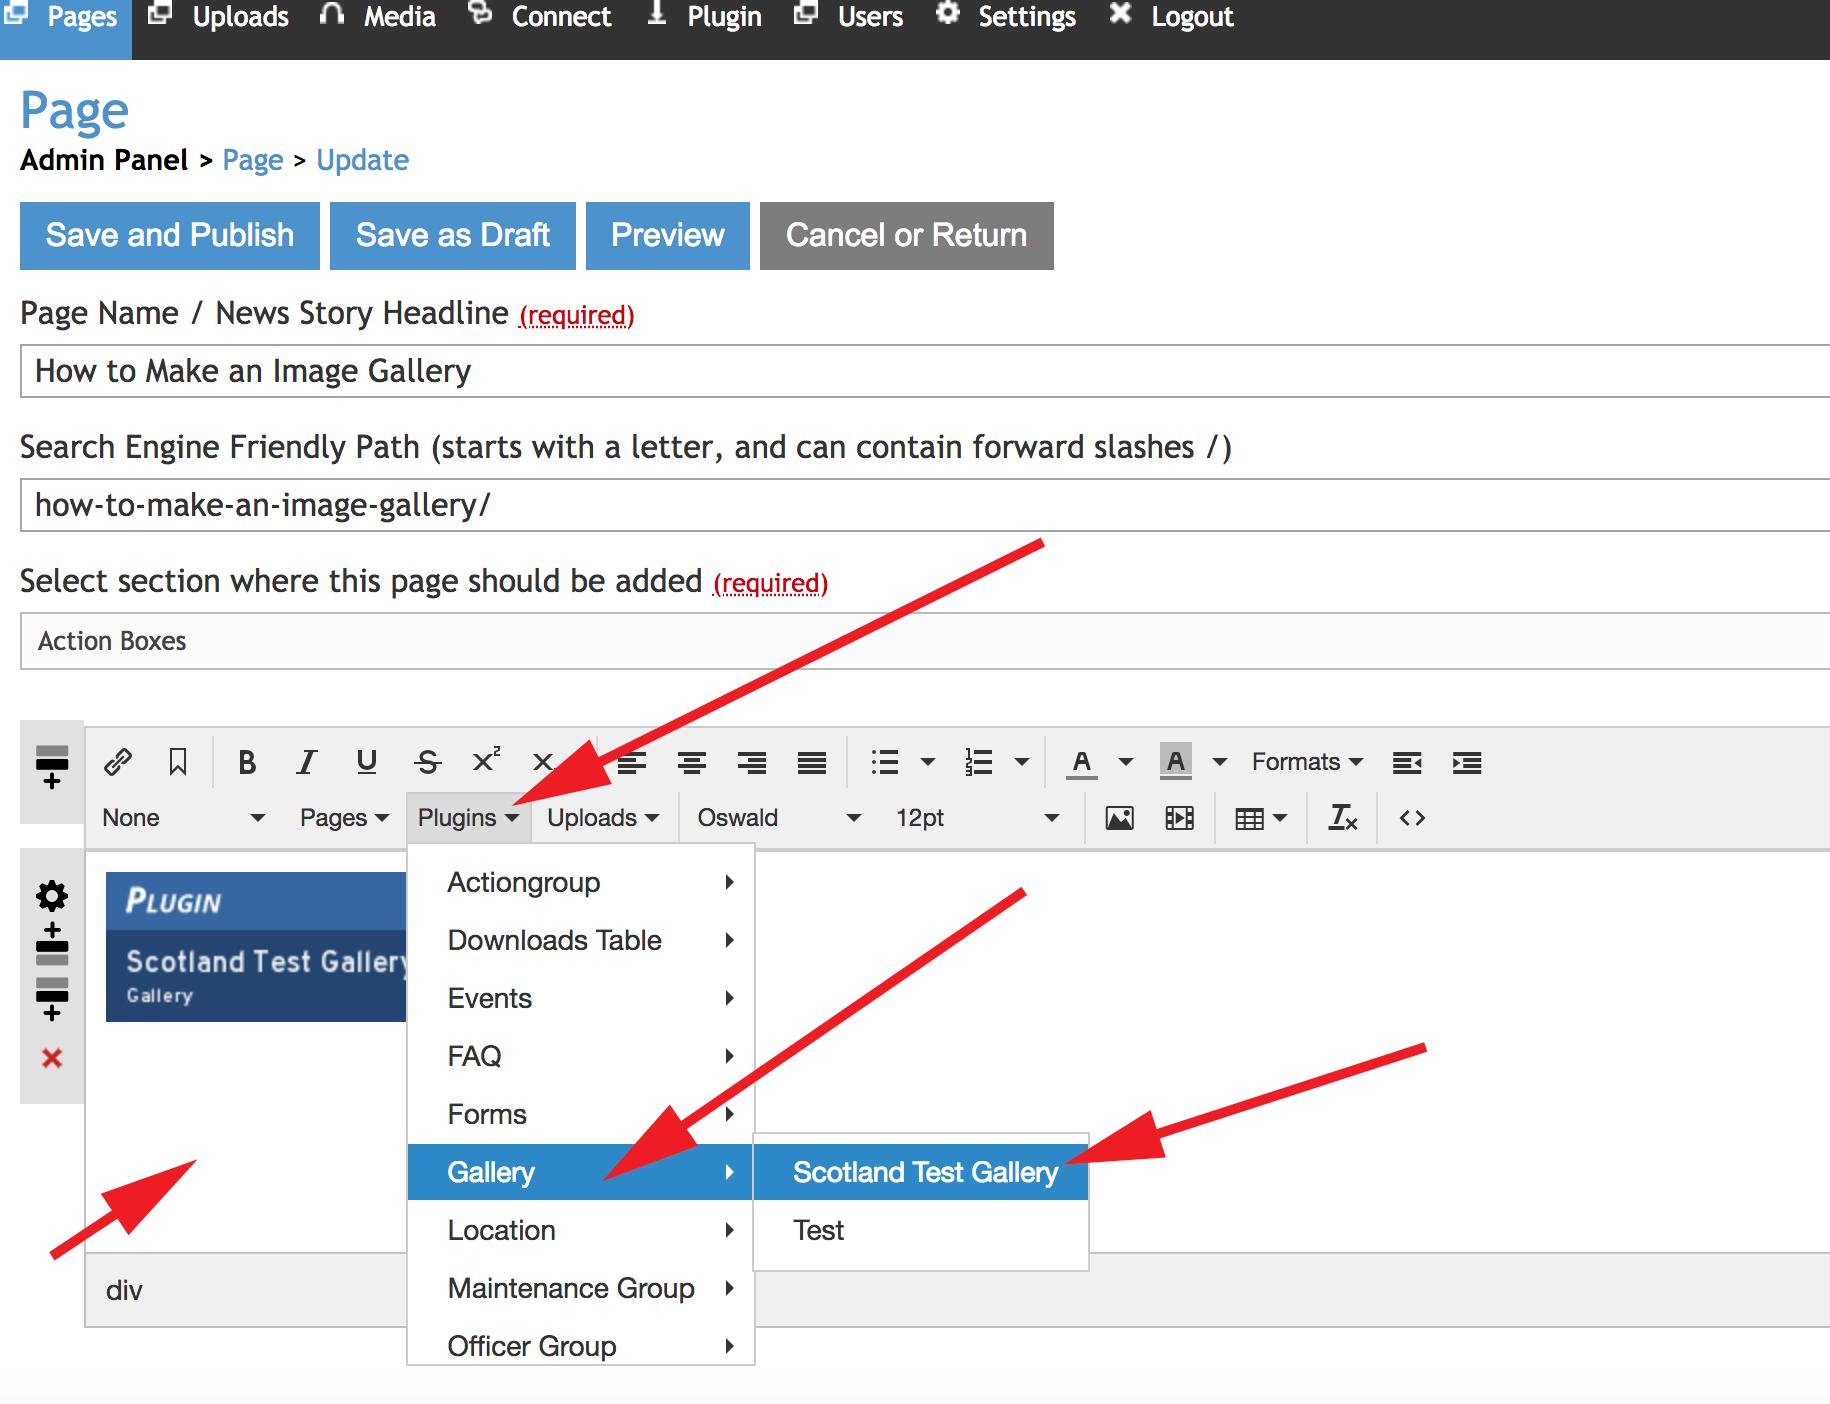
- Step 6: Choose the page where you wish the image gallery to be located.
- Click within the content box that you wish the image gallery to be located.
- Select 'Plugins'
- Select 'Gallery'
- Select your chosen image gallery.
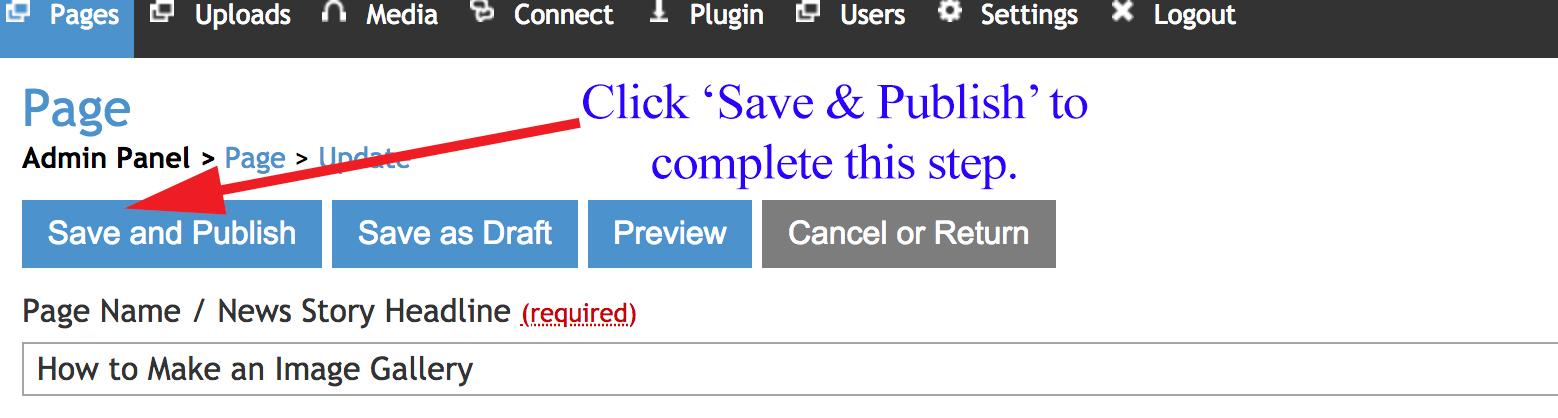
- Step 7: When you are done editing that page, click 'Save and Publish'.
You Can See the Results of this in the Image Gallery Below. (Coming Soon)